import { BrowserModule } from '@angular/platform-browser';
import { NgModule } from '@angular/core';
import { HttpClientModule } from '@angular/common/http';
import { ReactiveFormsModule } from '@angular/forms';

import { AppRoutingModule } from './app-routing.module';
import { AppComponent } from './app.component';

import { RouterModule } from '@angular/router';

import { TopBarComponent } from './top-bar/top-bar.component';
import { ProductListComponent } from './product-list/product-list.component';
import { ProductAlertsComponent } from './product-alerts/product-alerts.component';
import { ProductDetailComponent } from './product-detail/product-detail.component';
import { CartComponent } from './cart/cart.component';

@NgModule({
  declarations: [
    AppComponent,
    TopBarComponent,
    ProductListComponent,
    ProductAlertsComponent,
    ProductDetailComponent,
    CartComponent
  ],
  imports: [
    BrowserModule,
    HttpClientModule,
    AppRoutingModule,
    ReactiveFormsModule,
    RouterModule.forRoot([
      { path: '', component: ProductListComponent },
      { path: 'product/:productId', component: ProductDetailComponent },
      { path: 'cart', component: CartComponent}
    ]),
  ],
  providers: [],
  bootstrap: [AppComponent]
})

export class AppModule { }
ในส่วนของ Component ให้เราทำการ Import FormBuilder และกำหนด formBuilder ใน Constructor [บรรทัดที่ 4, 20]
กำหนด FormBuilder โดยเราจะตั้ง checkoutForm เป็น FormGroup เพื่อเก็บค่า name และ address [บรรทัดที่ 27]
เมื่อเริ่ม App เราจะกำหนดให้ name และ address เป็นค่าว่างไว้ก่อน [บรรทัดที่ 28-29] และสร้าง Method onSubmit เพื่อนำค่ามาใช้ [บรรทัดที่ 38-41]
import { Component, OnInit } from '@angular/core';

import { CartService } from '../cart.service';
import { FormBuilder } from '@angular/forms'

@Component({
  selector: 'app-cart',
  templateUrl: './cart.component.html',
  styleUrls: ['./cart.component.css']
})

export class CartComponent implements OnInit {

  items;
  shippingPrices;
  checkoutForm;

  constructor(
    private cartService: CartService,
    private formBuilder: FormBuilder
    ) { }

  ngOnInit() {
    this.items = this.cartService.getItems();
    this.shippingPrices = this.cartService.getShippingPrices();

    this.checkoutForm = this.formBuilder.group({
      name: '',
      address: ''
    });

    this.shippingPrices.subscribe((data) => {
      window.console.log(data);
    });

  }

  onSubmit(customerData){
    console.warn('Your order has been submitted', customerData);
    this.checkoutForm.reset();
  }

}
สร้าง Form เพื่อรับค่าโดยกำหนดค่า formGroup เป็น checkoutForm และ formControlName เป็น name และ address
<h1>Cart</h1>

<div class="cart-item" *ngFor="let item of items; index as itemId">
    <span>{{item.name}}</span>
    <span>{{item.price | currency }}</span>
</div>

<div class="shipping-item" *ngFor="let shippingPrice of shippingPrices | async">
    <span>{{shippingPrice.type}}</span>
    <span>{{shippingPrice.price}}</span>
</div>

<form [formGroup]="checkoutForm" (ngSubmit)="onSubmit(checkoutForm.value)">
    <div>
       <label for="name">Name</label>
       <input id="name" type="text" formControlName="name">
    </div>

    <div>
       <label for="address">Address</label>
       <input id="address" type="text" formControlName="address">
    </div>

    <button class="button" type="submit">Purchase</button>
</form>
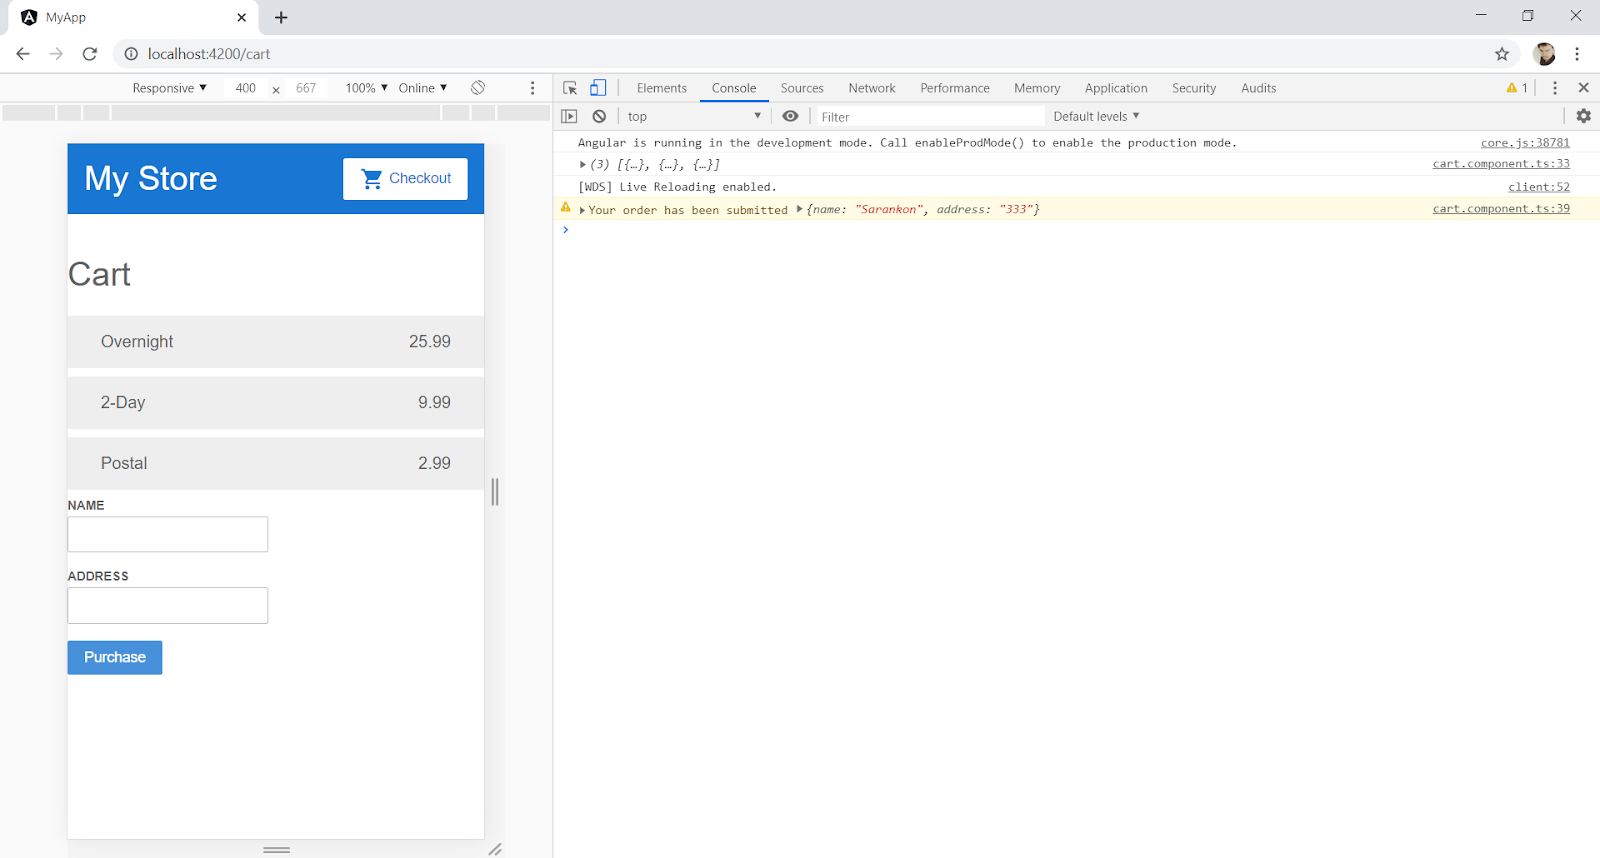
รูปแสดงตัวอย่างเวลาที่เรากรอกข้อมูลลงไป เสร็จแล้วทำการกดปุ่ม Purchase เราจะได้ข้อมูล ชื่อ และ ที่อยู่ที่เรากรอก เพื่อให้ไปใช้งานยังส่วนอื่นต่อไป

ไม่มีความคิดเห็น:
แสดงความคิดเห็น